Step-by-Step Guide to Custom Avatars for Your Domain Emails
So, if you don't already know, I'm a self-employed web developer. Basically, I come up with ideas for websites, build them, try to get them off the ground, and then move on to the next project. Rinse and repeat. At this point, I've accumulated a handful of websites that I own and manage—most of which don't get much traffic or make me any money. And that's fine by me. My approach to web development is more of a "shotgun style": blast out a ton of ideas and see what sticks.
A few of my sites are actually doing pretty well these days, and those are the ones I rely on for email purposes. Things like support emails, newsletters, and even automated messages sent directly from the sites. I want these emails to look as polished and professional as possible while maximizing their chances of landing in the recipient's inbox. If you're a web developer, you know just how tricky that last part can be.
Having spent nearly 30 years creating websites, I've learned a thing or two about email—mostly through trial and error. (Yes, I've definitely tanked a few domain (and IP) reputations with ill-advised spam blasts... LOL.) But I've finally dialed in a setup that works perfectly for me. One of the final pieces of the puzzle—and you probably guessed this from the title of the article—was figuring out how to use a custom avatar for my domain's email address.
This guide is part of my ongoing series, "How to Set Up and Send Email from Your Custom Domain Like a Pro". I'll walk you through the process of setting up email addresses for your custom domain, step by step. Not just setting them up, but setting them up correctly—so your emails look professional and stay out of the spam folder.
A Little Background
I've spent countless hours in the past trying to figure out how to get my own custom avatar to show next to my emails. No luck. Maybe I wasn't using the right search terms, but I usually rely on Google to search Reddit for me, and that method tends to work pretty well. Still, it wasn't until today that I finally had a breakthrough.
It all started when I got an email from someone I'd reached out to—a smaller YouTuber. I was surprised to see their email address had a custom avatar, not just the plain "letter in a circle" default. Nothing flashy; it was a Gmail account, so anyone can do that. But the picture was well-done, and it stood out. It got me thinking: I want my emails to have that same effect when people open them. I want them to think, "Wow, they've got their act together."
The thing is, I don't just use a Gmail account for every domain I own. That would get confusing fast, especially with my "shotgun approach" to websites—over time, I could easily end up managing 25, 50, or even 100 different accounts. Instead, I send email as those domain addresses from a single Gmail account. The downside? I can't set a unique avatar for each email address; Gmail only lets you have one avatar per account. Womp womp...
Well, that's how things were until today when I discovered something amazing: Brand Indicators for Message Identification (BIMI). It's a neat little standard supported by most major email providers that lets you display a custom avatar for your domain's email addresses. And guess what? It's relatively easy to set up. Seriously, how have I not heard of this before? It's exactly what I've been looking for all this time. Pinch me.
Excited, I dove in to figure out how to set it up. I started with the first tutorial I could find, and immediately hit a roadblock: you need an SVG of your logo or icon. Now, I've been using PNGs for images forever—probably the last 25 years—and I don't dabble much in SVGs. Naturally, I headed to the first online PNG-to-SVG converter I could find. Nope. The result was a garbled mess of colors that barely resembled my logo. Tried a second one—same thing. FUUUUUU--
Next, I thought, "Surely Photoshop can export to SVG, right?" I use Photoshop every day for work, so it's my go-to. I click File > Export > Export As... and... where is SVG? Turns out Adobe removed the SVG export option years ago. Because, of course, why make things easy? They want you to use 20 different programs and pay a subscription for each one (or shell out big bucks for their bundle). Classic Adobe.
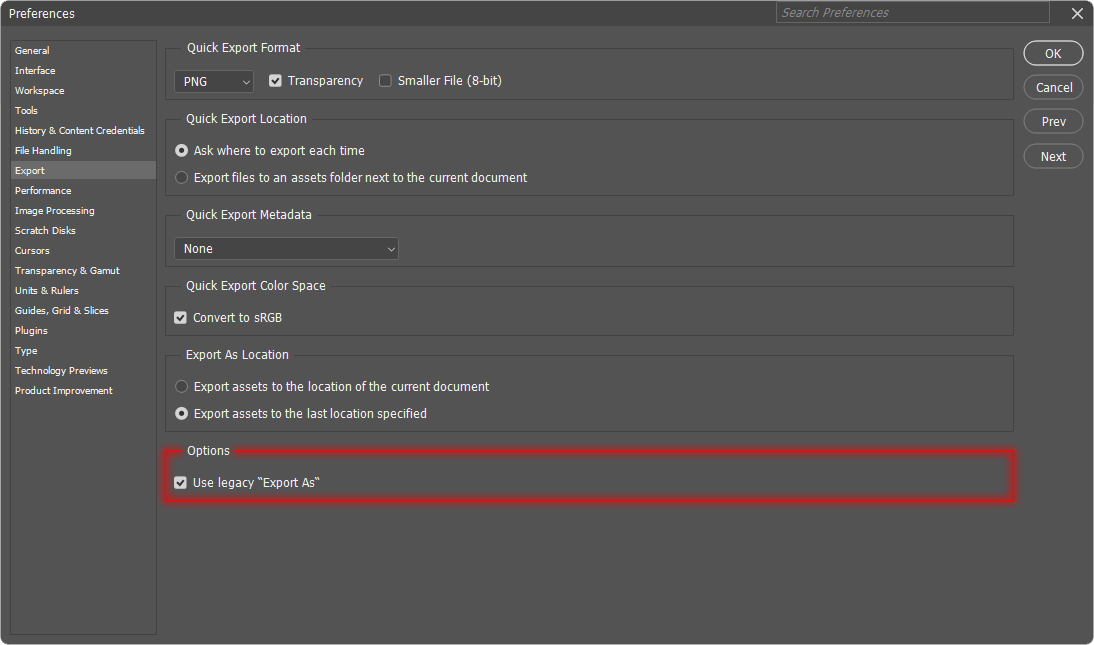
A bit of Googling later, I found that you can enable "legacy export" mode in Photoshop to get the SVG option back. 🙄 So, I did that, exported my logo as an SVG, and—oh baby—it came out crisp and perfect. Uploaded it to my server and plugged it into the BIMI record generator. Next step.
Then I saw this: "Link to VMC Certificate file." Uh, what now? I had no clue what that was, so I did some more Googling. Turns out, it's a special certificate that verifies your logo and brand—and it costs $100 a month. Yep, you read that right. There are only two companies that sell them (as far as I can tell), and both charge what feels like an absurd amount just to display your logo next to emails. Supposedly, the certificate ensures your logo isn't infringing on copyrights and stops others from using it. Still, it felt like a major buzzkill.
I spent the next hour scouring the internet for free alternatives. No luck. The general consensus was that you just have to pay the $100 and accept that it's dumb. Many people are holding out hope that Let's Encrypt will release a free version someday, like they did for SSL certificates back in the day.
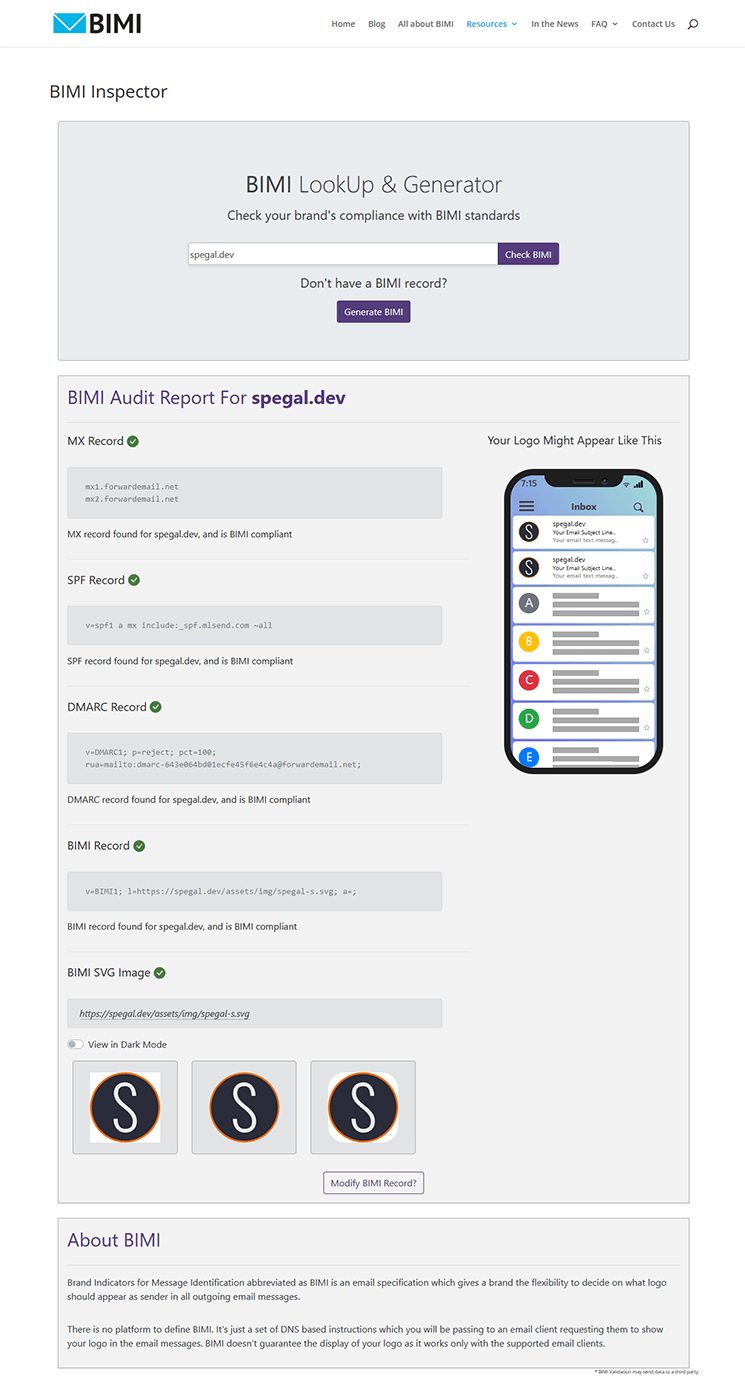
Eventually, I decided to try generating the BIMI record without linking to a certificate. I clicked "Generate BIMI Record," and... no errors, no warnings. It worked! I added the records to my domain's DNS settings, tested it with the BIMI Inspector, and everything showed green. Success!

After that, I whipped up SVG logos for all my active sites that use email, set up their BIMI records too, and—feeling pretty pleased with myself—sat down to write this guide. I know, I know, it hasn't been much of a guide yet. But don't worry, we're getting there. Right now, actually!
Luckily for you, I'm going to make this as quick and painless as possible. I've already taken up enough of your time with all the rambling earlier, so let's get right to it.
Step 1: Creating Your SVG
Make sure you have an SVG of your brand's logo or icon. If you're like me and use Photoshop, you'll need to enable the "Legacy Export" option:
- Go to Edit > Preferences > Export.
- Scroll to the very bottom under Options.
- Check the box for Use legacy "Export As".

Hopefully, you already know how to create and work with SVGs. If that's the case, you're ahead of the curve! If not, you can try an online PNG-to-SVG converter—though your results may vary (fair warning, those can be hit or miss). Just a heads-up: this isn't an SVG creation guide!
Step 2: Upload Your SVG
Next, upload your SVG to your server. Open up your trusty FTP client (or whatever file manager you use) and place the SVG somewhere on your domain. It doesn't matter where exactly, as long as it's accessible via a URL.
Step 3: BIMI Lookup & Generator
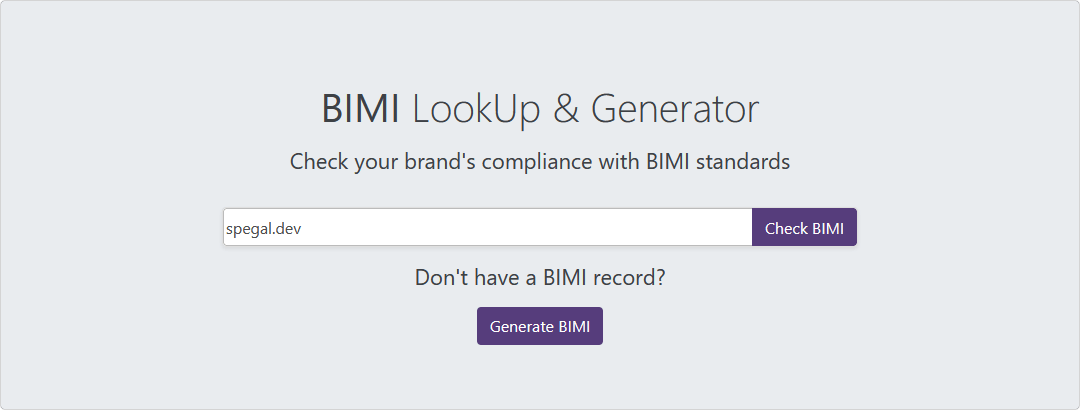
Head over to the BIMI Group's generator tool and type in your domain. Click Check BIMI to get an overview of how your domain is doing email-wise.

Now let's generate the BIMI record. Click Generate BIMI under where you entered your domain name.
Step 4: Generating the BIMI Record
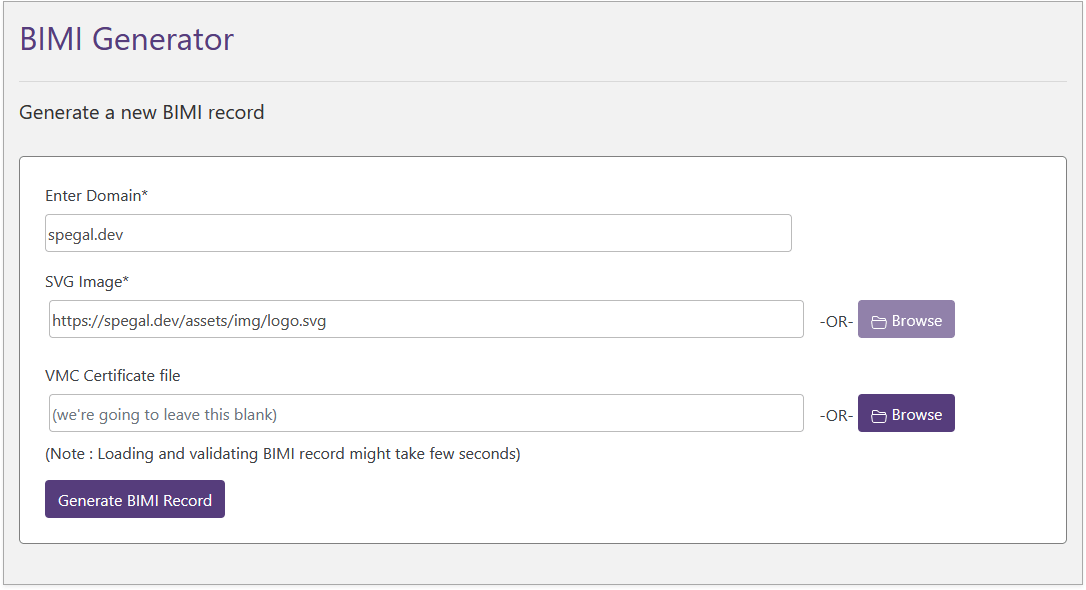
In the generator tool:
- Your domain name should already be filled in.
- Enter the URL to the SVG file you just uploaded (important: this URL must be on the same domain as the one you entered earlier—don't use an external image hosting service).
- Leave the VMC Certificate File field blank.
- Click Generate BIMI Record.

Boom, your BIMI record is ready to go.
Step 5: Adding the BIMI Record to Your DNS
Now, log in to your DNS provider. I use Cloudflare, but the process is similar for most providers.
- Navigate to your DNS settings and add a new TXT record.
- For the Name field, enter
default._bimi.followed by your domain name.- For example, mine looks like:
default._bimi.spegal.dev
- For example, mine looks like:
- For the Content field, copy and paste the record generated earlier. It should include three parts:
v,l&a- For example:
v=BIMI1; l=https://spegal.dev/assets/img/logo.svg; a=;Note: The generator outputs everything on one line. Make sure you're copying and pasting the record exactly as intended, and don't get confused by formatting.
- For example:
- Set the TTL (Time To Live) to 1 hour.

Save your changes, and you're done with the DNS setup.
And That's It!
No, really—that's all it takes! In just a few minutes, you'll have custom avatars set up for your emails. Keep in mind, though, it can take up to 48 hours for the changes to propagate and for your avatar image to start being displayed in emails. So don't worry if it doesn't happen right away.
BIMI has actually been around since February 2019, so it's surprising how underused (and underexplained) it still is. Of course, if you want to fully unlock its potential and ensure your avatar shows up everywhere, you'll need a VMC certificate. But at $100/month, I'll be holding out for a free alternative—fingers crossed for Let's Encrypt to step up like they did with SSL certificates.
For now, not having the VMC certificate doesn't seem to impact email deliverability or domain reputation. So enjoy your sleek new email look!
If this guide helped you, consider buying me a coffee or two. As a self-employed father of five, every little bit helps. Thanks for stopping by—see you next time! ☕

